


Hi there!
Welcome to my blog. In this article I will be talking a little bit about JavaScript Conditional Execution. You know, often when we write code, we want to perform different actions based on different conditions. What I mean is, not all programs are straight roads. We may, for example, want to create a branching road, where the program takes the proper road branch based on the situation at hand. This is called conditional execution.
Conditional execution is created with the if keyword in JavaScript. In the simple case, we want code to be executed if, and only, if a certain condition is true. This is where conditional statements comes in.
After reading this article, you will learn how to use them and when to use them effectively.
The if Statement
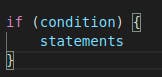
We use if to specify a block of code that we want to be executed if a specified condition is true.
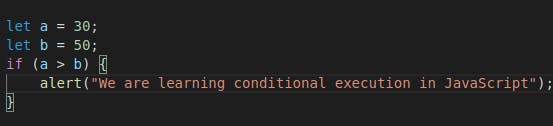
Let's look at an example:

Result:
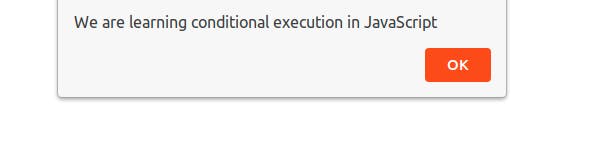
You can see from the example above that we've used the JavaScript alert() to generate a popup alert box that contains the information inside the parentheses when the condition is true.
Let's explore this in detail:
Let's write a conditional statement that evaluates to false and see what happens.
When you run this, you see nothing on your browser because the condition evaluates to false, the alert statement get skipped and the program continue with the line after the if statement's closing curly braces.
if is in lowercase letters. Uppercase letters (IF, If or iF) won't work.
The if...else Statement
You often won't just have code that executes when a condition holds true, but also code that handle the other case. We can use the else statement to specify a block of code that will execute if the condition is false. Like this:

The "else" statement is created to tell JavaScript to execute something if the condition is false
Here's an example of the if and else statements working together:
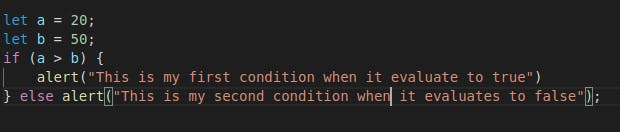
Let's translate that example. It says:
- if a is greater than b, alert("This is my first condition when it evaluates to true");
- else, alert("This is my second condition when it evaluates to false");
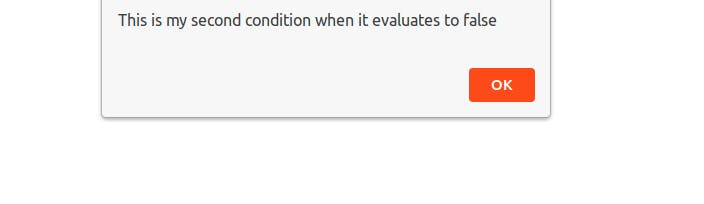
So the browser will print out the second condition, as 20 is not greater than 50.
Result:
You can skip the curly braces if the code under the condition contains only one command.
The if...elseif...else Statement
The else if statement is useful when we want to specify a new condition if the first condition is false.
Like this:
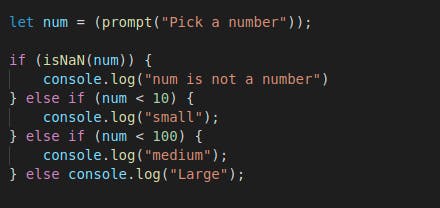
The above program first, check whether num is a number. If it is, it then checks if num is less than 10. If it is , it chooses that branch, shows "small" and is done. If it isn't, it checks the else branch, which itself contains a second if. If the third condition (< 100) holds, that means the number is between 10 and 100, "medium" is shown on the console. If it doesn't, the second and last else branch is chosen and "Large" is shown.
The final else statement "ends" the else if statement and should be always written after the if and else if statements. Also, you can write as many else if statements a you need
The switch Statement
In a program where you would need to test for multiple conditions, writing if...else statements for each condition might not be the best solution. Instead we can use the switch statement to perform different actions based on different conditions.
Here's what that looks like:
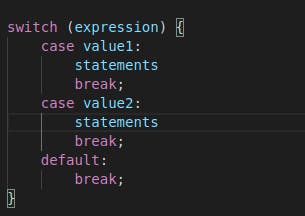
The switch case is only evaluated once. The value of the expression is compared with the values of each case, and if there's a match, that block of code is executed.
You can achieve the same result with multiple if...else statements, but in such situations the switch statement is more effective.
Let's take an example:
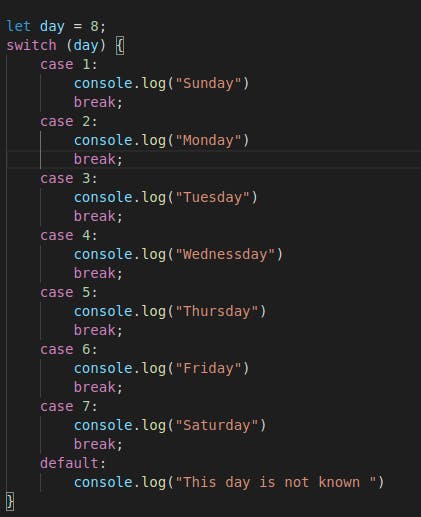
Lets explain this code:
Think of this way: switch "switches" which code is run depending on the variable. The example above does a good job of showing how switch works:
In our case the variable is "8". Since there is no matching case for "8", the default code runs instead. If the variable changes to a different number (such as 5), then the case "5"code would run, and so on.
You can have as many case statements as you need, and you can only have one "case" statements for each possible answer.
Now! you might be wondering what the break keyword does in a switch case statement. You don't have to worry, I'll tell you!
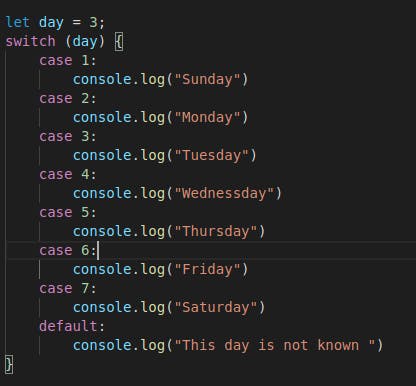
Switch will check each condition, in order, until one is true. Once true, the block will execute statements until a break is reached (including subsequent case whether true or not). In the example above, let's remove all the breaks and see what happens:
now if you check the console, you see this:
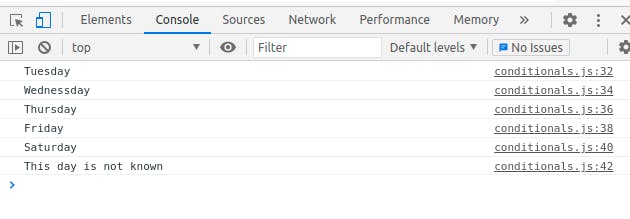
By omitting breaks, you are implying you want the next case to execute as well. 'break' tells the compiler to break out of the code if it return true and go back to the switch statement to compare the argument against the next code blocks. Otherwise if it returns true, all subsequent code without a break will be considered as true and executed. So we use "break" to avoid executing false statements as that is not what we want.
Usually, a break should be put in each case statement
I guess you should also be wondering what the default keyword does too! I'll tell you still.
The "default" keyword is more like the "else" in the "if else" block. The "default" keyword specifies the code to run if there's no case to match.
The default block can be omitted, if there is no need to handle the case when no match is found.
And that's pretty it! 😉 Now you know what JavaScript Conditional Execution is! Thank you for reading. byee!👋